PythonのGUIプログラミングはTkinterが標準ライブラリとしてプリセットされています。ここではTkinterのwidgetレイアウトを効率的に行うFrame/pack/gridを理解してみます。
こんにちは。wat(@watlablog)です。ここではTkinterのGUIプログラミングで知っていると便利なレイアウトに関する内容を学習してみます!
Tkinterのwidgetレイアウトの基本
window(root)
レイアウトを作るメソッドをそれぞれ紹介する前に、Tkinterの基本からおさらいしていきましょう。
まずは全ての基本であるWindowです。以下はMacの表示ですが、OSによりそれぞれ異なるWindowにGUIの各種widgetを配置していきます。
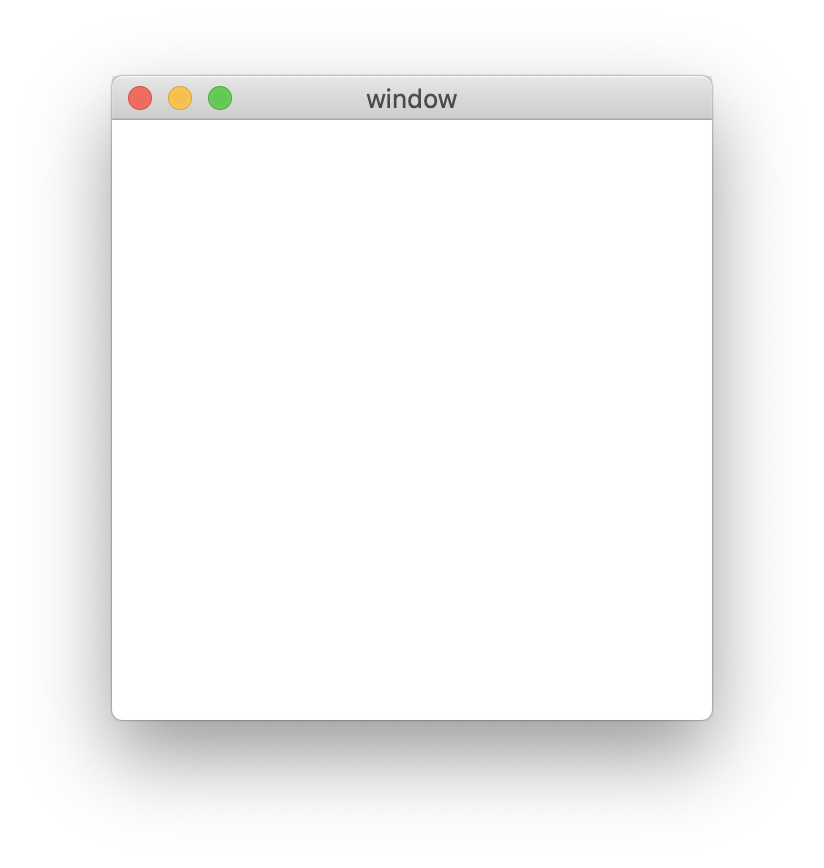
Windowは以下のコードで用意します。このWindowはroot(ルート)と呼ばれることが多いです。
|
1 2 3 4 5 |
from tkinter import * # メインウィンドウの設定 root = Tk() #ウィンドウを定義 root.title("window") #ウィンドウタイトルを設定 root.geometry("300x300") #ウィンドウサイズを設定 |
widget
widget(ウィジェット)とは、ボタンやラベル、ラジオボタンといったオブジェクトのことで、ユーザが操作したり情報を読み取ったりするものです。
当ブログでは「Python Tkinterのボタンでイベント処理」で紹介したように、ボタンやラベルwidgetを使ったことがあります。
以下の図にラベルとボタンのwidgetを示します。ユーザインターフェースとしては基本ですね。
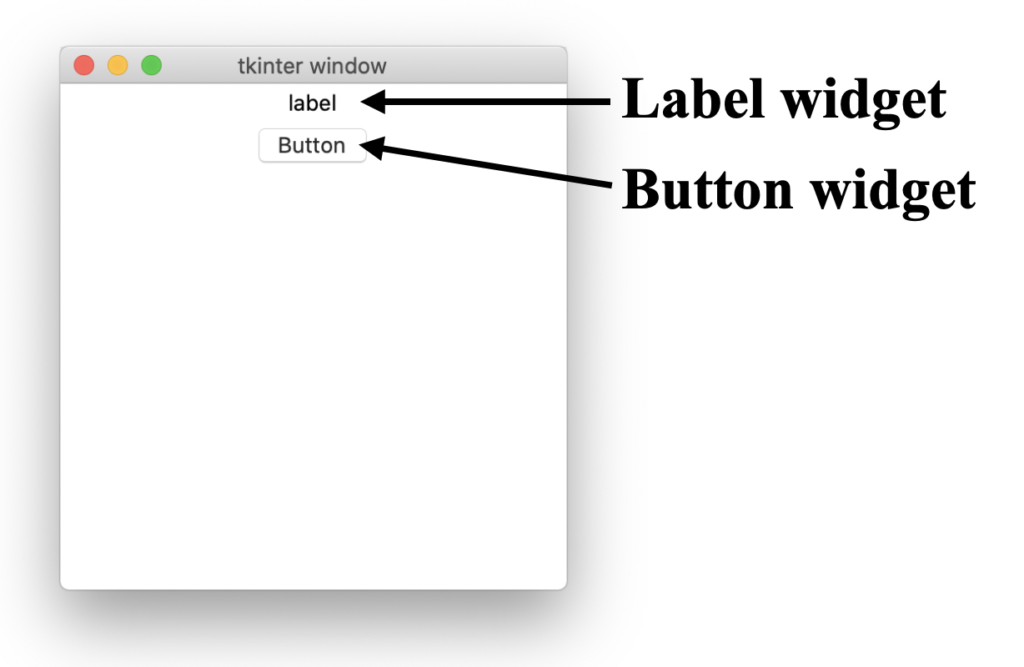
widgetは以下のコードで定義します(import tkinter as tkとしている人はtk.Label()とかになります)。
|
1 2 3 |
# widgetを設定 label = Label(root, text='label') # ラベルを定義 button = Button(root, text='Button', command=btn_1) # ボタンを定義(commandにイベント関数を設定) |
widgetについてはBasic widgetとして以下の公式ドキュメントに多数記載されていますので、是非参考にして下さい。
Tk Tutorial:https://tkdocs.com/tutorial/widgets.html
Frame
Frame(フレーム)とは、複数のwidgetを1つにまとめる入れ物のことです。
以下の図はボタンwidgetを3つのFrameでそれぞれまとめたものです。Frameでまとめることで、関連の操作をひとまとめにすることができ、コードもわかりやすくなるメリットがあります。
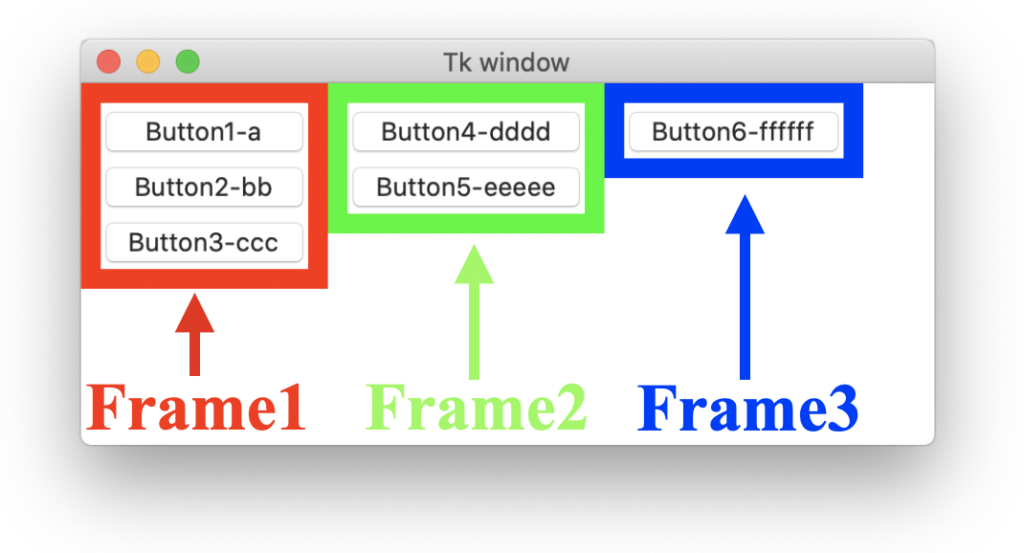
Frameは以下のコードで定義します。引数に先ほど紹介したwindow(root)を設定することで、定義したwindow内にFrameを入れることが出来るようになります。
|
1 2 3 4 |
# Frameを設定 frame_1 = Frame(root) frame_2 = Frame(root) frame_3 = Frame(root) |
Frame内にwidgetを配置させるためには、widgetの引数にFrame名を指定する必要があります。
以下にbutton_1というボタンwidgetをframe_1というFrameに配置させた場合のコードを例として紹介します。
|
1 2 |
# ボタンwidgetを設定 button_1 = Button(frame_1, text='Button1-a', command=btn_1) |
Frameのオプション一覧を以下にまとめておきます。お好みで色々見た目を変更することができるため、是非お試し下さい。
| オプション | 値 | 説明 |
| bg= | color name(リスト) | 背景色を決める。 |
| bd= | int値 | ボーダーラインの幅を決める。default=0 |
| relief= | FLAT, RAISED, SUNKENN, GROOVE, RIDGE | bdで指定した線に対して見た目を変える。default=FLAT |
| width= | int値 | フレームの幅を明示的に指定する。 |
| height= | int値 | フレームの高さを明示的に指定する。 |
pack
pack(パック)は定義したwidgetを一列に並べて配置させる時に使います。
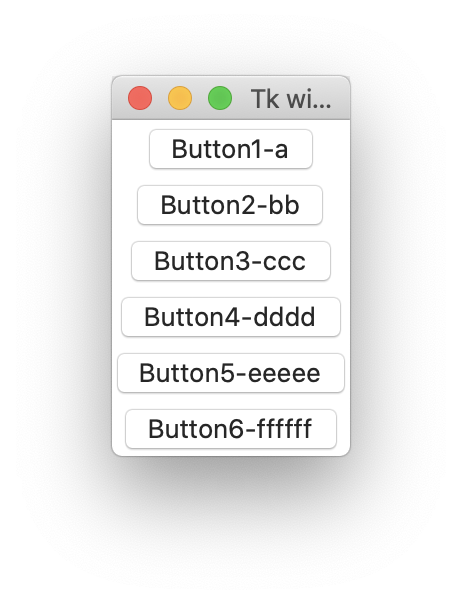
3つのフレーム、6個のボタンwidgetをまずはpackデフォルト設定(以下のコード)で配置させてみます。※関数は省略。
|
1 2 3 4 5 6 7 8 9 10 11 12 13 14 15 16 17 18 19 20 21 22 23 |
# Frameを設定 frame_1 = Frame(root) frame_2 = Frame(root) frame_3 = Frame(root) # widgetを設定 button_1 = Button(frame_1, text='Button1-a', command=btn_1) button_2 = Button(frame_1, text='Button2-bb', command=btn_2) button_3 = Button(frame_1, text='Button3-ccc', command=btn_3) button_4 = Button(frame_2, text='Button4-dddd', command=btn_4) button_5 = Button(frame_2, text='Button5-eeeee', command=btn_5) button_6 = Button(frame_3, text='Button6-ffffff', command=btn_6) # widgetの配置を設定 frame_1.pack() frame_2.pack() frame_3.pack() button_1.pack() button_2.pack() button_3.pack() button_4.pack() button_5.pack() button_6.pack() |
下図に示すように、縦一列に全て配置されました。ただ、これだとフレームでまとめた感がありません。
フレームとボタンのpackに対して以下のようにコードを変更してみます。
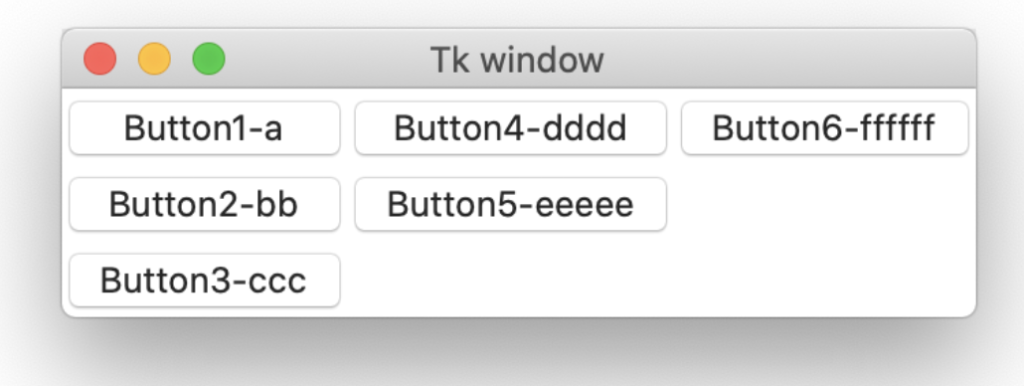
ここで、side=LEFTは左詰め、anchor=NWは左上配置(NorthWestの意)、fill=Xは横方向にサイズを揃えるというものです。
|
1 2 3 4 5 6 7 8 9 10 |
# widgetの配置を設定 frame_1.pack(side=LEFT, anchor=NW) frame_2.pack(side=LEFT, anchor=NW) frame_3.pack(side=LEFT, anchor=NW) button_1.pack(fill=X) button_2.pack(fill=X) button_3.pack(fill=X) button_4.pack(fill=X) button_5.pack(fill=X) button_6.pack(fill=X) |
上記指定を行うと、下図のようにフレーム毎に左上から横一列に並び、ボタンのサイズも揃うという結果になります。
ここでは全て実践しませんが、以下にpackのオプションをまとめておきます。
| オプション | 値 | 説明 |
| anchor= | E, W, S, N, NE, SE, NW, SW, CENTER | widgetの寄せ方向を決める。default=CENTER |
| expand= | 0, 1 | ジオメトリマスタの余分なスペースを埋めるために拡大する(1)かしない(0(default))かを決める。 |
| fill= | NONE, X, Y, BOTH | widgetの空きスペースを埋める方向を決める。default=NONE |
| padx= | int値 | widget外側、横方向の隙間を指定。default=0 |
| pady= | int値 | widget外側、縦方向の隙間を指定。default=0 |
| ipadx= | int値 | widget内側、横方向の隙間を指定。default=0 |
| ipady= | int値 | widget内側、縦方向の隙間を指定。default=0 |
| side= | TOP, LEFT, RIGHT, BOTTOM | widgetを詰める方向を決める。default=TOP |
grid
grid(グリッド)はwidgetを2次元的に配置させます。使い方は簡単で、row(行)とcolumn(列)に関する設定を行うだけです。
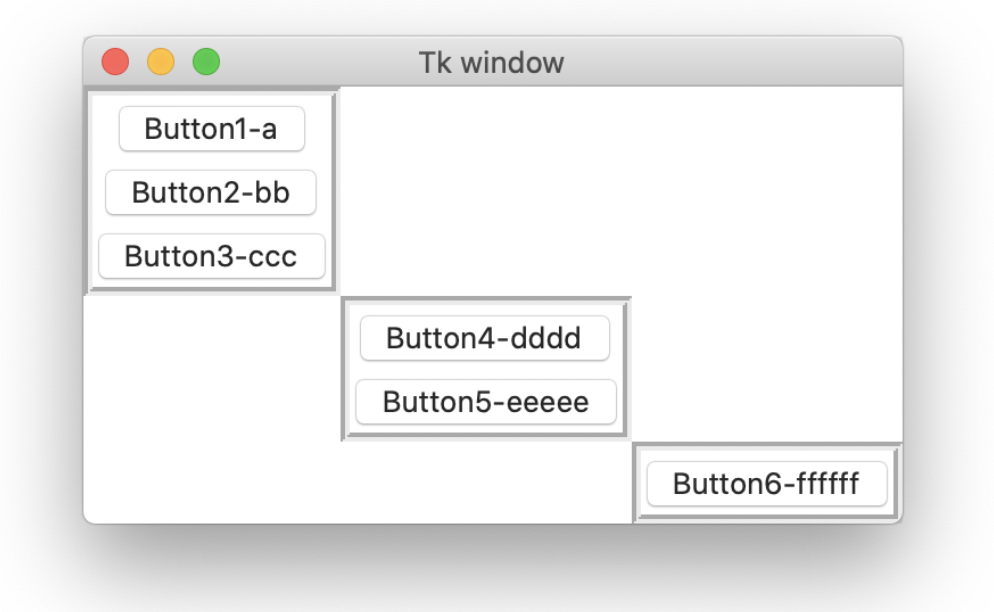
先ほどpackで使ったコードをgridにしてみたものを以下に示します。境界がわかるようFrameにbdとreliefを設定しています。
|
1 2 3 4 5 6 7 8 9 10 11 12 13 14 15 16 17 18 19 20 21 22 23 |
# Frameを設定 frame_1 = Frame(root, bd=4, relief=GROOVE) frame_2 = Frame(root, bd=4, relief=GROOVE) frame_3 = Frame(root, bd=4, relief=GROOVE) # ボタンwidgetを設定 button_1 = Button(frame_1, text='Button1-a', command=btn_1) button_2 = Button(frame_1, text='Button2-bb', command=btn_2) button_3 = Button(frame_1, text='Button3-ccc', command=btn_3) button_4 = Button(frame_2, text='Button4-dddd', command=btn_4) button_5 = Button(frame_2, text='Button5-eeeee', command=btn_5) button_6 = Button(frame_3, text='Button6-ffffff', command=btn_6) # widgetの配置を設定 frame_1.grid(row=0, column=0) frame_2.grid(row=1, column=1) frame_3.grid(row=2, column=2) button_1.pack() button_2.pack() button_3.pack() button_4.pack() button_5.pack() button_6.pack() |
下図が配置結果です。このようにグリッドの座標で配置を決めることができます。
gridのオプションを以下にまとめておきます。
| オプション | 値 | 説明 |
| row= | int値 | 行位置を決める。 |
| column= | int値 | 列位置を決める。 |
| rowspan= | int値 | 繋げる行数を指定する。default=1 |
| columnspan= | int値 | 繋げる列数を指定する。default=1 |
| padx= | int値 | widget外側、横方向の隙間を指定。default=0 |
| pady= | int値 | widget外側、縦方向の隙間を指定。default=0 |
| ipadx= | int値 | widget内側、横方向の隙間を指定。default=0 |
| ipady= | int値 | widget内側、縦方向の隙間を指定。default=0 |
| sticky= | E, W, S, N, NE, SE, NW, SW, CENTER | packのanchor+fill機能。配置の寄せ方向を決め、複数指定(W + E等)で引き伸ばすことができる。 |
サンプルコード
ここまで覚えた事を駆使すると、下図のようにフレームの配置を整理(上段は2列接続して幅を揃える、下段は高さを揃える)することができます(好みによりますが)。
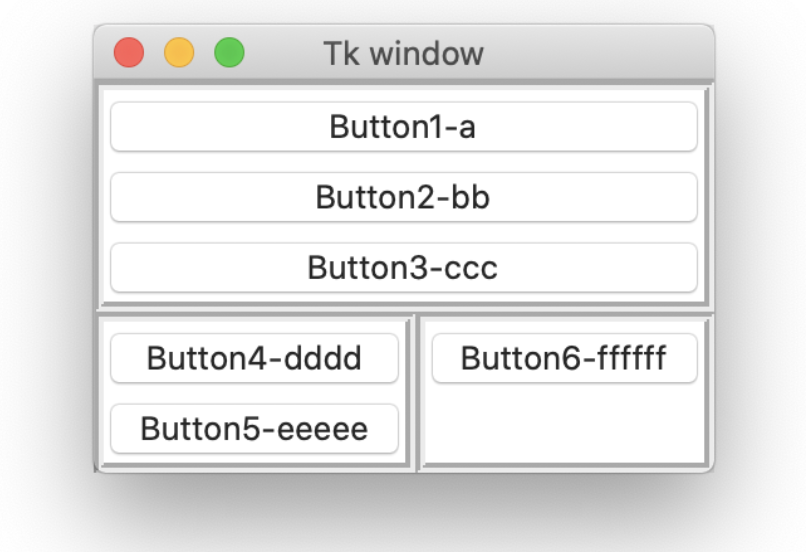
上図は以下のコードで生成可能です。ここではそのままコピペ検証ができるように全コードを載せておきます。
|
1 2 3 4 5 6 7 8 9 10 11 12 13 14 15 16 17 18 19 20 21 22 23 24 25 26 27 28 29 30 31 32 33 34 35 36 37 38 39 40 41 42 43 44 45 46 |
from tkinter import * # ボタンイベント関数 def btn_1(): pass def btn_2(): pass def btn_3(): pass def btn_4(): pass def btn_5(): pass def btn_6(): pass # メインウィンドウの設定 root = Tk() root.title("Tk window") root.geometry() # Frameを設定 frame_1 = Frame(root, bd=4, relief=GROOVE) frame_2 = Frame(root, bd=4, relief=GROOVE) frame_3 = Frame(root, bd=4, relief=GROOVE) # ボタンwidgetを設定 button_1 = Button(frame_1, text='Button1-a', command=btn_1) button_2 = Button(frame_1, text='Button2-bb', command=btn_2) button_3 = Button(frame_1, text='Button3-ccc', command=btn_3) button_4 = Button(frame_2, text='Button4-dddd', command=btn_4) button_5 = Button(frame_2, text='Button5-eeeee', command=btn_5) button_6 = Button(frame_3, text='Button6-ffffff', command=btn_6) # widgetの配置を設定 frame_1.grid(row=0, column=0, columnspan=2, sticky=W + E) frame_2.grid(row=1, column=0) frame_3.grid(row=1, column=1, sticky=N + S) button_1.pack(fill=X) button_2.pack(fill=X) button_3.pack(fill=X) button_4.pack(fill=X) button_5.pack(fill=X) button_6.pack(fill=X) root.mainloop() |
まとめ
本記事ではPythonに標準で備わっているGUIプログラミングライブラリTkinterのwidget, Frame, pack, gridをまとめました。
適当にGUIの配置を決めるよりも、これらのレイアウト要素を決めてからアプリケーションを作っていった方が、よりユーザーフレンドリなものになりそうです。
レイアウト要素にはplaceというものもありましたが、placeは扱いにくいとの評価が多くここでは説明していません。
Tkinterでレイアウトの基本を覚えました!これからGUIアプリケーションも少し作っていこうと思います!
Twitterでも関連情報をつぶやいているので、wat(@watlablog)のフォローお待ちしています!

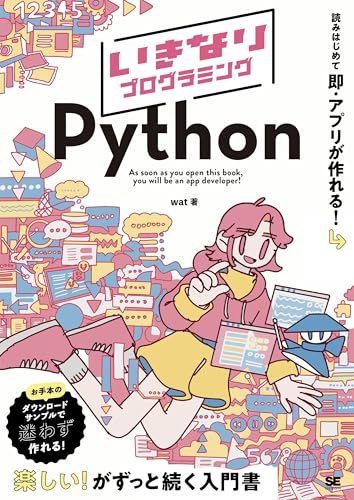 ついにWATLABブログから書籍「いきなりプログラミングPython」が発売しました!
コメント